
Copyright 2010 - 2035 RVS Software Inc.. All Rights Reserved.
Adding Accounts
![]() Click the
'Add Customer' icon from the main screen in RVS.
Click the
'Add Customer' icon from the main screen in RVS.
The system will automatically add the account numbers as you go in sequential
order starting from 1 (or the lowest sequential account number if you are
using custom account numbers). If you have cleared account space by setting
an account to DELETE status, its account number will be recycled for the next
time you go to add a new customer.
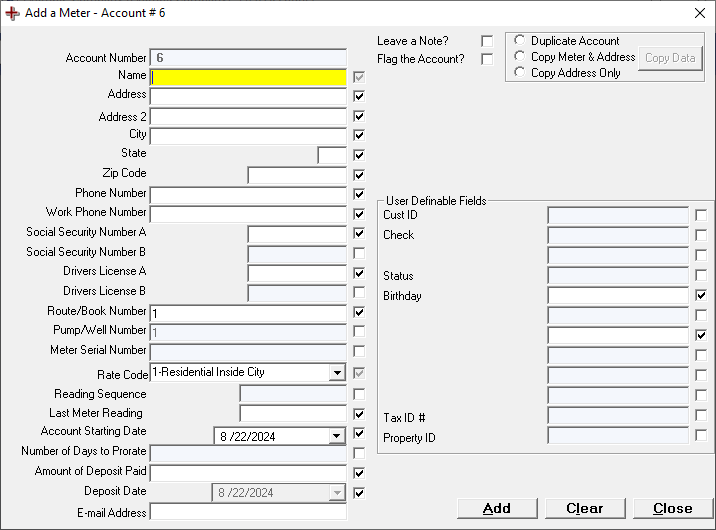
Try and fill in as much information as you can at the time of account creation.
If you do not have all of the necessary information for the account, you can
always go back and add the information later on the Customer Account page.
| Field | Description |
|---|---|
| Name | The name of the customer on the account. Limited to 25 characters in length. |
| Address / City / State / Zip Code | Here you should enter the billing address for the customer.
Ensure that you enter the parts of the address in the correct fields.
There will be a separate section to add a customer's service address. If you are using the Service Locations or Lead & Copper module you will be prompted for the service location after clicking Add
at the bottom. |
| Rate Code | Select the rate code for the customer from the drop-down list of all rate codes in your system. |